티스토리 뷰
배열 형태의 entry

index.js파일 끝에 googleAnaylytics.js를 append함.
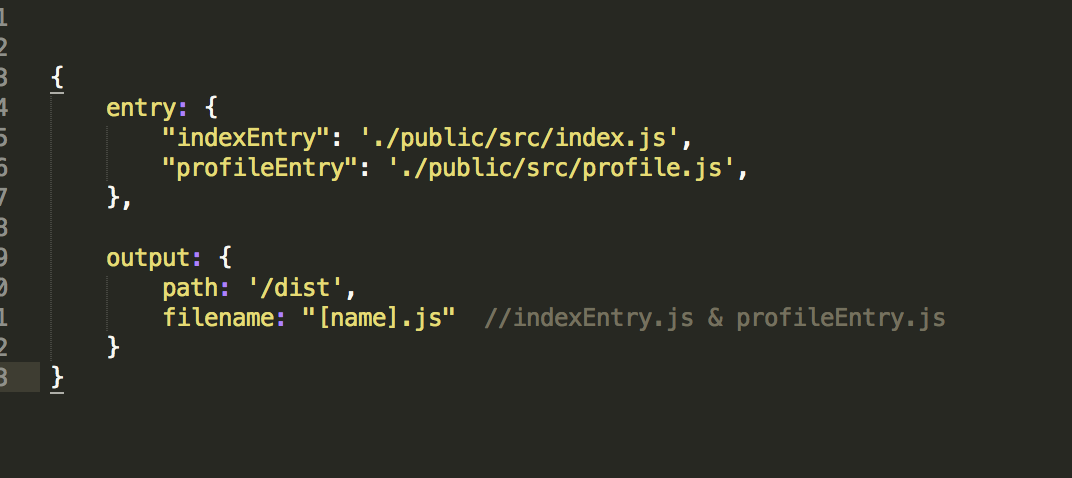
객체 형태의 entry

멀티 페이지 애플리케이션에서 여러개의 html이 있는 경우 사용한다. 두개의 진입점을 통해 indexEntry.js, profileEntry.js 두개의 번들 파일이 만들어진다.
//profile.html
<script src=”dist/profileEntry.js”></script>

//index.html
<script src=”dist/indexEntry.js”></script>
각 html에서 번들된 js를 불러와서 사용하면 된다.
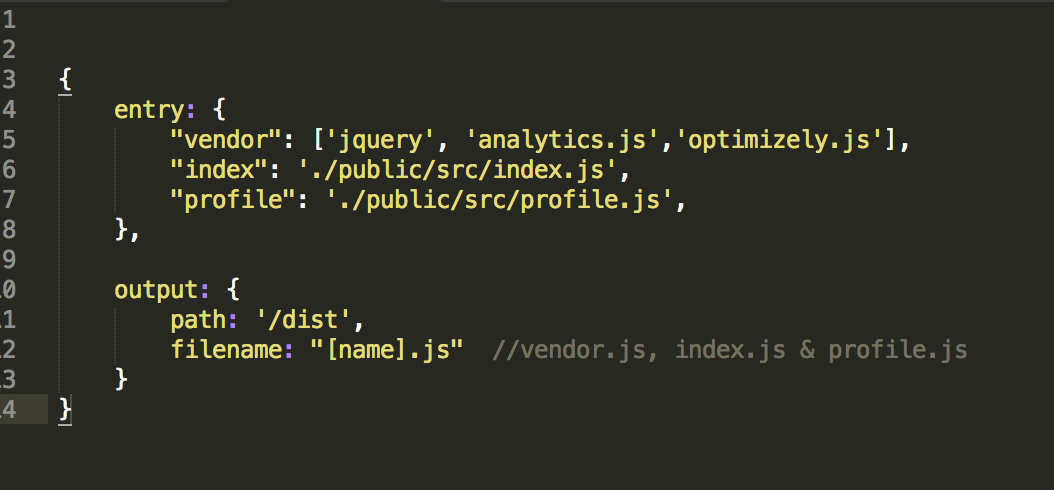
객체 + 배열 혼합 entry

vendor.js, index.js, profile.js 3개의 번들 파일이 만들어진다. vendor.js는 jquery와 analytics, optimizely 3개의 자바스크립트 파일이 합쳐진 상태로 번들된다.
Output

Path: 웹팩이 번들파일을 어느 폴더에 놓을것인지 지정.
PublicPath: 웹팩 Production Build시 플러그인들이 참조하는 기본 경로이다.
출처
https://medium.com/@rajaraodv/webpack-the-confusing-parts-58712f8fcad9
'Webpack' 카테고리의 다른 글
| node_module안에 들어있는 css를 가져오지 못하는 현상 (0) | 2020.06.04 |
|---|---|
| 빌드타임, 런타임 코드 스플리팅 (0) | 2020.04.17 |
| require.context (0) | 2020.03.23 |
| 바벨 (0) | 2019.10.02 |
| Yarn.lock 이란? (0) | 2019.10.01 |
댓글
최근에 올라온 글
최근에 달린 댓글
- Total
- Today
- Yesterday
링크
TAG
- Next.js
- server side rendering
- await
- design system
- react hooks
- reflow
- Babel
- Polyfill
- rendering scope
- javascript
- useEffect
- type alias
- storybook
- react
- es6
- hydrate
- return type
- state
- atomic design
- useRef
- mobx
- computed
- promise
- typescript
- reducer
- Action
- async
- reactdom
- props
- webpack
| 일 | 월 | 화 | 수 | 목 | 금 | 토 |
|---|---|---|---|---|---|---|
| 1 | 2 | 3 | ||||
| 4 | 5 | 6 | 7 | 8 | 9 | 10 |
| 11 | 12 | 13 | 14 | 15 | 16 | 17 |
| 18 | 19 | 20 | 21 | 22 | 23 | 24 |
| 25 | 26 | 27 | 28 | 29 | 30 | 31 |
글 보관함
